Wednesday, June 29, 2011

How to NOT Grow a Garden

I was really excited this spring. I had a lot of hopes for our garden. As we planted those tiny seeds, I had visions of making salads, bread and butter pickles, pickled beets, zucchini fritters, frozen peas, pumpkin pies. I just knew that we'd be harvesting our own watermelon and cantaloupe for the 4th of July parties. I wanted to involve the kids in taking care of our (what would obviously be) beautiful plants.

Instead, we learned a lot of things that make a garden turn out really crummy. So here is what to do if you do NOT want to grow a successful garden.

1. Do not put an adequate fence around the perimeter. By not doing this, you are providing an endless buffet to those lovely woodland creatures such as bunnies and deer. They will even reduce your giant sunflowers down to stemmy nubs.
2. Have torrential rains that completely flood the garden (and your entire backyard) for about a month. You might not have any control over this, but if you make sure to plant your seeds immediately before this weather occurs, then you will ensure that all of your root vegetables will rot and the delicate lettuce seeds that you so carefully sowed will be washed away.

3. Make sure that the location of your garden was once occupied by a copious amount of aggressive weeds. This way, after the rain stops and anything that has survived begins to grow, the plants will shortly be strangled by thistle and thick grasses. This will also ensure that your children will not be able to help with garden chores, due to the prickers and thorns, thereby accomplishing two failures in one step.

While we followed these steps to NOT growing a garden, almost perfectly, we failed at creating a complete disappointment of a garden. At least, as of this moment.

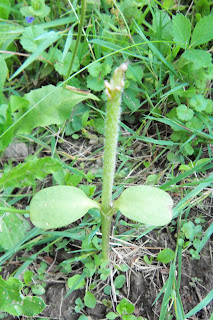
We do have one pea blossom, on one out of about 40 pea plants (two varieties). A glimmer of hope that not all is lost. The pea plants seem to be a favorite among the rabbits, but for some reason this one plant has avoided the munching.
We also have two zucchini plants that actually thrived. One has several flowers on it, the other only a couple. I did notice there were some munch marks on these plants however, I'm hoping they survive the Bunny Buffet until we can get an adequate fence. Many people don't realize that you can eat zucchini blossoms. I had been wanting several more plants, so I could harvest the blossoms on some of them as well. They are delicious in stir fries and other wonderful dishes, and they provide quite a bit of folate and potassium.
The corn has been doing especially well. One variety is growing better than the other, but I think that is because of where we planted them. Here is the corn a couple of weeks ago, just a bit below knee level.
 And here are the kids standing in front of it today when it is about waist high.
  
We also have four carrots, and several beets. Even though a lot of what we planted, never even sprouted, or sprouted only to meet an early fate, we are trying to focus on what we do have growing out there. Hopefully we will be able to nurture it into being at least somewhat productive.
Monday, June 27, 2011

Easy Lunch: Simple Chicken and Broccoli Stir Fry

This week, our grocery store was having a sale for bone-in chicken, buy one get one free. Whereas I normally buy whole chickens, it was cheaper this week to buy chicken breast and take advantage of the sale. Once I got it home, it was easy to remove the meat from the bone and skin, then I had endless recipes.

For a quick lunch, I made a simple chicken and broccoli stir fry.

About 1 lb chicken breast cubed into even pieces
1 or 2 stalks of fresh broccoli
2 tablespoons extra virgin olive oil
salt and pepper to taste
dash of curry powder

In a wok or non stick pan, heat the olive oil under medium heat. Add the chicken, stirring almost constantly. Cook the chicken for about 10 minutes or until you can't see any pink on any of the chicken. Add the broccoli, salt, pepper, and curry poweder to the pan and continue to stir it while it cooks. Cook for about 5-10 minutes longer or until the chicken is cooked through and starting to brown a bit, and the broccoli is  a bright green.

Tuesday, June 21, 2011

With Me Every Mile

A woman selling sports energy drinks at a health and fitness expo stood in front of me gaping "you run with THAT bohemoth?" Of course I do; I couldn't be where I am with my running if it weren't for this tank of a stroller. Sure it's a bit awkward to navigate through the mall, or crowded health and fitness expos, but on the road this baby turns on a dime, runs across any kind of terrain thrown at it, and despite how big it looks it is actually quite light compared to other strollers.

The fact of the matter is, I am a mom. I can't take my runs during my lunch break. I can't take a quick jog around the block before dinner. I can't leave work a few minutes early to squeeze in a couple extra miles. No, I have to take my work with me.

There is once a week when I can run outside alone. I have a standing appointment with my shoes and the pavement outside our door every Saturday at naptime. My husband understands this and I hardly have to tell him where I'm going. Other than this time, the only other way that I get a solitary run is to go on the treadmill after bedtime.

These times are great for my long runs. When I am by myself, I can really push my limits. However, in between those times, I just need a short and light run to keep my body moving. I used to take the kids with me every time I ran, but then I also used to run outside every time, I didn't run more than 3 miles, and we lived in a very safe subdivision with a low speed limit and drivers that knew to watch for pedestrians in the road. Now that we live in an area with higher traffic volume, and I am training for longer distance endurance events, I pick and choose when I bring the kids along.

The days when just a light half hour will do, I pack up the kids and we head to the metroparks. Here are a few tips on how to make running with kids in tow a little more enjoyable for everyone:

~bring water for everyone. It's hot and humid out there, and if the kids see you taking sips of water they will want some too! Sippy cups avoid melt downs for us. If your stroller lacks a built in cup holder for the kiddo (as most do) then you can purchase one that screws onto the side.

~Consider what "add ons" you could use on your stroller. There are quite a few items on the market. Caddies that velcro onto the handle bar, phone and GPS holders that enable you to clearly see the screens of these devices, and even a gadget that allows you to push the stroller hands free with your waist!

~Don't set any expectations or goals when you run with the kids. Consider how much time they are spending in the stroller, and it's no surprise that they will probably get cranky and bored after a half hour or forty five minutes. It's not fun for anyone when the kids are screaming in the stroller.

~Be selective of what you let them have while in the stroller. We have lost shoes, books, toys, pacifiers, sippy cups, hair bows, socks, hats, and stuffed animals, over the sides of the stroller. When my kids get bored, the first thing they do is to start chucking stuff over the sides. I'm too much "in the zone" and they are too stealth about it for me to notice. Sometimes we find the items on the second loop around, and I've been known to back track for miles looking for a lost shoe. Now my kids ride barefoot most of the time (Jonah is getting old enough not to throw shoes now) and I don't give them anything that I would miss if it got tossed.

~Nursing moms, invest in a nursing sports bra. Eve always wants to eat after a run. I am not sure what it is about it, maybe it's because she's been "separated" from me, or maybe my sweat releases pheremones that make her think "Mommy=milk" I don't know, but I almost always have to nurse her before getting back in the car to head home. Sometimes I even have to stop at a bench during the run to nurse. Regular sports bras are really awkward to nurse in, and even though I have no qualms about nursing in public, I feel self conscious if I have to nurse while wearing a regular sports bra.

~Remember that this is their way of supporting you! Don't get frustrated with the inconveniences of taking your kids along. They are cheering for you in their own little way, and you are setting an example for them of how to keep fit and exercise. Have fun with it, and go with the flow!

Monday, June 6, 2011

Decorations for a Diva

I think one of the most fun things about a party is the decorations. For Eve's Puppies and Poodles party, we bought a standard "party kit" with balloons, streamers, table cloths, and confetti, but I wanted to have a more personal feel. After looking at various party stores and online for something that would fit both the theme of the party and my daughter's personality, I decided that it would be best to make our own decorations.

Our bill at the craft store came to $32.49. Much less than had I bought the signs, party bags, and high chair decorating kit from a party store. We could have spent even less had I planned better, since I only used about half of the paper that I bought. The final price also includes a hot glue gun and glue sticks, because I couldn't find the one that I already own. I already owned the cricut and cartridges that I used. For lettering, I used the Story Book cartridge, and for graphics, I used the Paper Pups cartridge.

We have a hidden drive, so a sign was needed to indicate where the party is, for the guests who have not yet been to our house. I bought a half sized piece of white poster board and a thin dowel rod. Using the Cricut, I cut out letters in black cardstock to be four inches tall. I hand cut a black arrow and arranged everything onto the posterboard using regular white glue. I then used the Cricut to cut a poodle out of pink card stock to be 3.5 inches tall, and a balloon at the 2 inch size (the balloon's "height" on the cricut is measured from one side of the balloon to the other, not the end of the string to the top of the balloon.) I cut several other dog and birthday related shapes out of black and white cardstock and used white glue to position them onto the poster board. I cut the dowel rod in half and used packing tape to secure a half to both sides of the poster board on the back. I also taped balloons and streamers to the sign, but as you can see in the picture, the wind got the best of them.

For the happy 1st birthday banner, I placed the 8x11 pink cardstock onto the Cricut mat and cut two letters at a time on the "fit to page" setting. For the "1st" portion of the banner, I used card stock that is white with black sparkly polka dots. I cut the 1 with the height of 8 inches and the ST was cut at a height of 2 inches out of the pink card stock. Using a hot glue gun, I attached each letter to a pink ribbon. If I do this again, I would cut each letter at a height of 7, for consistency, and string each letter at the top rather than in the middle. The letters wouldn't stay upright because they were hung from the middle!

For the high chair banner, I used hot pink boa that I measured by wrapping around the high chair tray and cutting off where I needed it to end (such a scientific process!) I cut triangles from hot pink paper that is textured with hot pink polka dots, and from the same black polka dotted paper that was used for the 1 in the happy birthday banner. I used hot glue to secure the triangles to the boa, and then packing tape held the banner onto the tray.

For the goody bags, I cut the bag using the Plantin School Book cartridge, using the "fit to page" setting on an 8x11 piece of paper. The paper used was the same textured pink paper from the high chair banner. Some had small dots and others had large dots.  I then cut a black poodle to be 2 inches tall, and the graphic word "Woof" also to be 2 inches tall. I used white glue to position them onto the assembled bags. I then filled the bags with a kazoo, starburst candy, a small bubble container, a dog shaped lollipop, and a small plush poodle. The large pink bags you see in the picture are the bags for the infant guests. They contained a travel sized plastic container of cheerios, and  a single serving bag of Gerber L'il crunchies, rather than the candy items.


One final touch that many people commented on, was my use of dog dishes for the chip and veggie dips. I got this idea from my sister, who did her son's first birthday party in a dog theme three years ago. I was very lucky and happened to find pink plastic dog dishes with pink paw prints on them, in the wal mart dollar section. I scrubbed them with hot water and soap, and then used them to hold the salsa, hummus, and chip dip. Note: they were NEVER used for dog food!!!!

Making our own decorations gave the party a nice personal edge. It was fun and very cost effective. I definitely think that I will be using more homemade decorations for future birthday parties!

Thursday, June 2, 2011

Trimmed in Tutus

I love pictures of babies in tutus. Depending on how the picture is set up, they can make babies look soft and sophisticated, or spunky and full of character. I decided a long time ago that Eve would be wearing a tutu on her birthday. When I heard that my friend and former co-worker had opened up a business called Tessa's Tutus, I knew just where I was going to get it from!


Tessa's Tutus is a mommy run, out of home business that, like several of the other businesses that I review, was inspired by her own child. Several styles and options are available, and if you don't see exactly what you need, it is very easy to customize your order. I had already bought the "Birthday Girl" shirt, and I knew that I wanted the tutu to match. I contacted the owner, sent her a picture of the shirt, and roughly described what I wanted. I was very impressed with all of the options for customizing. Not only are there several colors to choose from, but also several different kinds of embellishments such as ribbons and flowers. I was emailed back shortly with a couple of choices. I really appreciated that she took the time to make sure that she knew what I wanted.

When the tutu arrived and we opened the box, I was very excited to see that it was just what I had wanted it to look like. I have ordered tutus from several vendors on etsy, and bought them from department stores and boutiques. This tutu blew the others out of the water. I was very impressed by the fluffyness of it. I can't tell you how many times I've bought a tutu from someone who claims that their tutus have a lot of fluff, only to be disappointed by a flat and thin tutu. Tessa's Tutus need very little primping and fluffing to achieve that full bodied skirt look. I was also very pleased with the way that the ribbons were incorporated into the tulle. They matched the lettering on the shirt very nicely, and gave the tutu just the right amount of character and texture without being too over the top. When I first placed the order, I was afraid that it would turn out gawdy and the multicolored ribbons would just be too much. But I was very pleased with the way that all of the components were incorporated.

The Diva will certainly be dressed like a princess on her big day. Thank you to Tessa's Tutus for helping us to pamper our little angel.
 
**Obligatory disclaimer of transparency: The tutu that was reviewed in this blog post was paid for in full. I do have a prior affiliation with the owner of Tessa's Tutus, but only in that we were coworkers at a nursery school several years ago**

Wednesday, June 1, 2011

Pretty in Pink Lemonade Poodle Cupcakes

As a kid, one of my favorite summertime treats was pink lemonade. Because Eve was born in the summer, and because it just seems so fun and girly, pink lemonade cupcakes seem to be a perfect fit for her party.

1 box vanilla (white) cake mix
amount of water and oil indicated on cake mix box
3/4 cup thawed frozen pink lemonade concentrate
pink/red food coloring

Preheat the oven to 350 F. Mix the first three ingredients in a medium mixing bowl. Add one or two drops of the food coloring to make the cakes appear to be a vibrant pink. Line a cupcake pan with pink cupcake liners. For the poodle cupcakes, you will need one standard size cupcake and one mini cupcake for each serving. Bake standard sized cupcakes 20-30 minutes or until a toothpick inserted into the middle comes out clean. Bake the mini cupcakes for 10-20 minutes.

When the cakes are completely cooled, follow the directions found here to decorate them to look like poodles! The only thing that I will be doing differently is that I will be cutting caramel-vanilla marshmallows into the shapes of the ears and snout.

I also thought that since not everyone is crazy about pink lemonade, to tie in the "puppies" part of our theme I would decorate chocolate and vanilla cupcakes as shown here.

If you are traditional and believe that the only birthday cake is a real cake (not a cupcake) then you can wrap these up in pretty cellophane bags and use them as favors.

One little tip that I am finding out though is that you need to keep these as cool as possible for as long as possible. When the frosting begins to melt, the facial features start to fall off, and the poodles begin to look a little scary! If you have a fridge handy on site, I would use that. A cooler with ice on the bottom, covered with a small cookie sheet (to keep the ice separate from the cakes)and the cupcakes on top would be the second best.